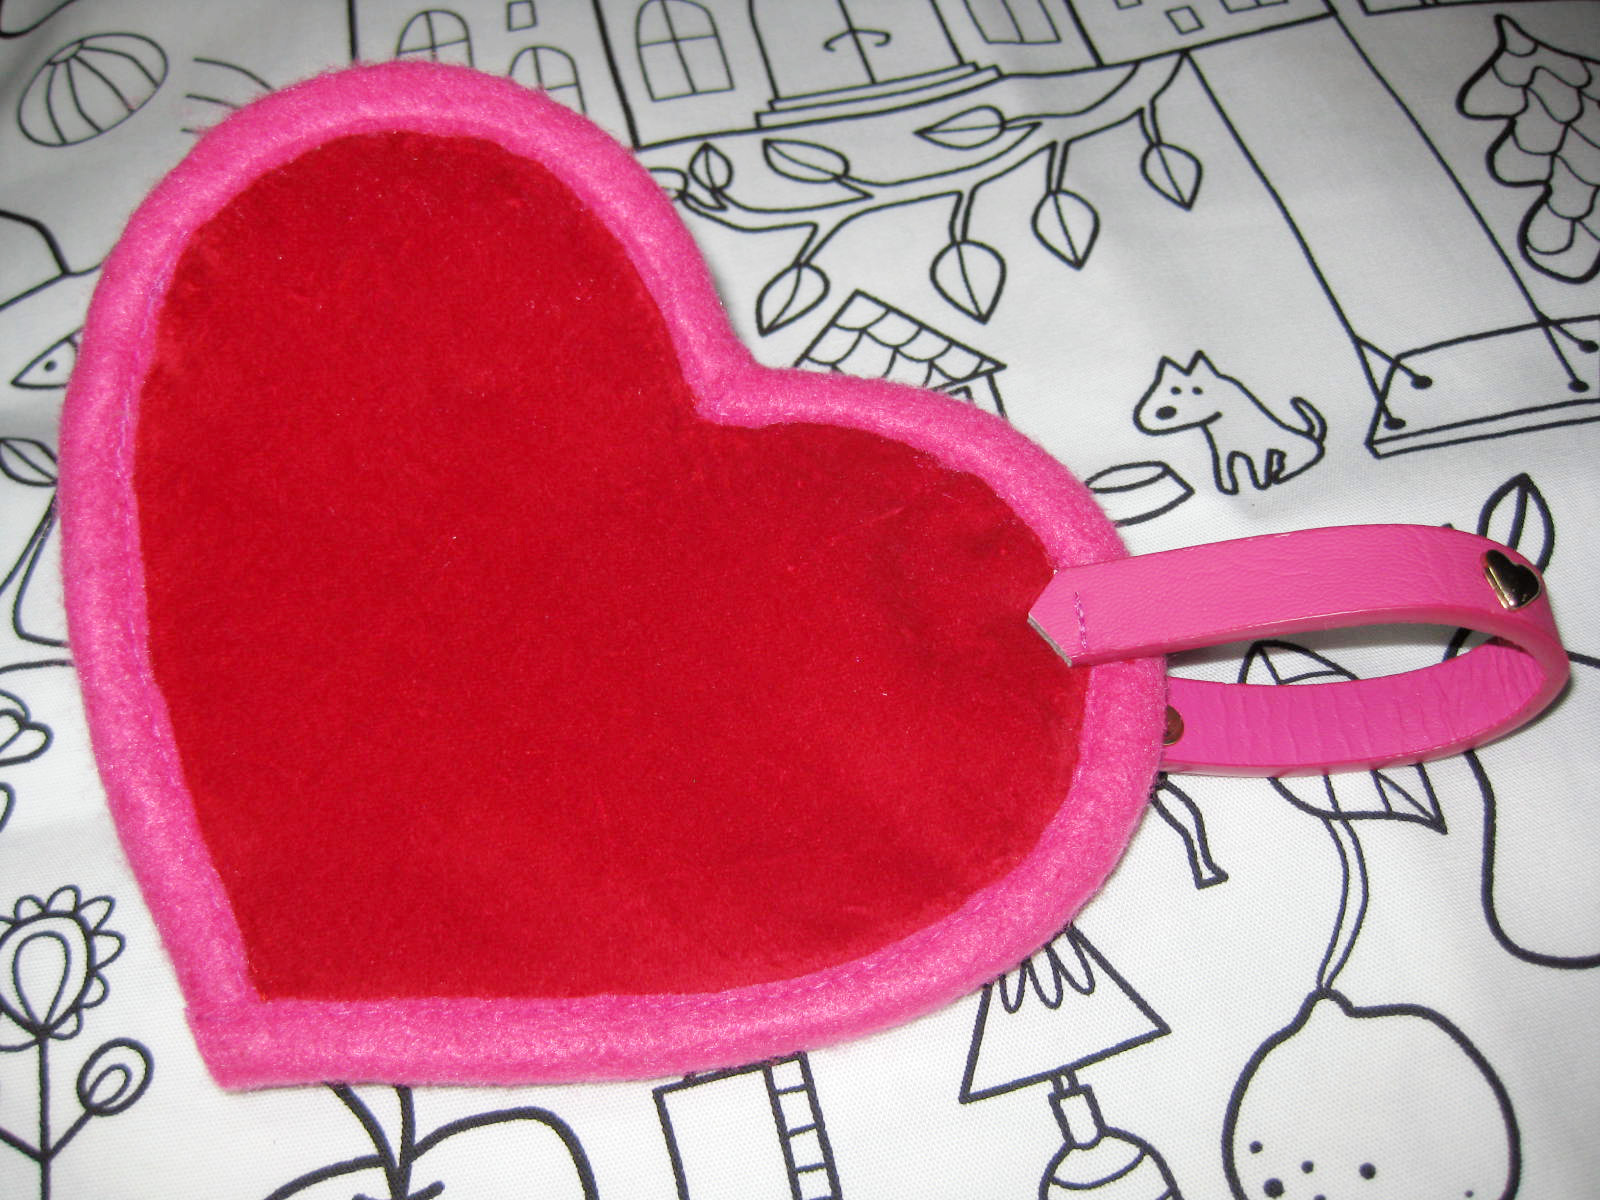


A cute little Felt bound Heart shaped Purse with a
horizontal zipped front and cute little tucks to give it that 3D shape!
Height 14cm Width
17cm
Fabrics used:
Main Fabric – Cotton
Velvet
Lining – Cotton
Binding - Felt
THE PATTERNS:


(-Print the patterns-)
MATERIALS TO
MAKE THIS BAG, YOU WILL NEED:
- 65cm x 25cm of Main Fabric
- 65cm x 25cm of Lining
- 65cm x 25cm of Curtain Interlining
- 2 x 26cm x 5cm Strips of Felt
- Matching Thread
- 1 x 7” (18cm) Zip
- Coordinating Belt
TOOLS YOU
WILL NEED:
- Sewing Machine
- Fabric Scissors
- Paper Scissors
- Pins
- Steam Iron
You
will need the following cut pieces:
Upper Front:
- Cut 1 Main Fabric
- Cut 1 Lining
Lower Front:
- Cut 1 Main Fabric
- Cut 1 Lining
Back:
- Cut 1 Main Fabric
- Cut 1 Lining
Curtain Interlining:
- 1x Upper Front
- 1x Lower Front
- 1x Back
STEP 1
Place the Zip facing down onto the RS Main Fabric of the Upper Front
and then place the Lining Upper Front RS down topped with the Curtain
Interlining and pin.
STEP 2
Using a Zipper Foot stitch close to the Zip teeth.
STEP 3
Snip the Corners of the seam to reduce bulk later when applying the
Binding. Trim the Curtain Interlining seam to also reduce bulk in the seam and
then trim the Zip to size.


STEP 4
As in Step 1 - Place the Zip facing down onto the RS Main Fabric of
the Lower Front and then place the Lining of the Lower Front RS down topped
with the Curtain Interlining and pin.
STEP 5
On the Lower Front, matching the 2 Notches (all layers) fold the
tuck down, pin and stitch to secure as shown. Repeat for the other side of the
Heart.


STEP 6
Prepare the Back by laying the Curtain Interlining onto the WS of the Main Fabric and the Lining RS up, sandwiching the Curtain Interlining in between the 2 layers. Matching the Notches, Place the Front of the Heart onto the Back and pin into position. Stitch around the whole Heart perimeter. Trim the whole perimeter seam down to 3mm to neaten the edge in preparation for the Binding.

STEP 7
Using one of the Felt strips pin into place, start at the top “V”
and work down towards the point. And
then stitch a 1cm seam allowance to attach the felt.
STEP 8
Roll the
Binding over to the back of the purse and pin into position. Make sure that the
Binding is pulled tight and even, but be careful not to stretch or tear the
Felt in the process. Also make sure that the seam is fully contained inside the
Binding. The Binding must be pulled past the stitch line as picture above right.

STEP 9
Stitch on the RS inside the seam (Known as, Sink
Stitch or Stitch in a Ditch) to secure the Binding.
Turn the
purse to the back and trim away excess felt with sharp scissors. Be careful not
to cut the stitching!
STEP 10
For the other side, start by pinning and sewing the binding from the
bottom point upwards. Leave about 1cm extra for the top “V” overhang to cover
the seam gap. Roll the Binding over to the back of the purse and pin into
position. Make sure that the Binding is pulled tight and even, but be careful
not to stretch or tear the Felt in the process. Also make sure that the seam is
contained inside the Binding. The Binding must be pulled past the stitch line.
Stitch on the RS inside the seam (Known as, Sink Stitch or Stitch in a Ditch)
to secure the Binding.

STEP 11
At the Top “V” topstitch the binding to secure both layers of Felt.
Trim to stitch line.
STEP 12
To complete the Purse, I added a little strap upcycled from a thin
Belt. I cut 19cm, shaped the ends by trimming them and then stitching one edge
at a time and off centring them because of the thickness and ET VOILA DONE!

*Copyright of this pattern belongs to Molly Quest Patterns. You may sell items you have created using this pattern, as long as you give credit to MollyQuest.com for the original pattern. You may not resell the pattern itself, distribute or share this actual pattern or any of its content in any form nor may you alter the pattern, instructions and claim them as your own. Copyright © Molly Quest Patterns 2012
Hope you enjoy making this Heart Purse for Valentine's Day!
No comments:
Post a Comment